Friday, October 28, 2016

How to create a self-signed SSL certificate for webMethods Integration Server with OpenSSL

Here’s a short step-by-step guide on how to create and install a self-signed SSL certificate for testing purposes in webMethods Integration Server. You can test secure HTTPS connections from clients to Integration Server with this certificate.

Create a certificate

You can easily create the certificate using OpenSSL on a Linux system.
  • Create a private key.
    openssl genrsa -des3 -out integrationserver.key 1024
    
    Generating RSA private key, 1024 bit long modulus
    ........................++++++
    .++++++
    e is 65537 (0x10001)
    Enter pass phrase for integrationserver.key:
    Verifying - Enter pass phrase for integrationserver.key:
  • Create a certificate signing request (CSR).
    openssl req -new -key integrationserver.key -out integrationserver.csr
    
    Enter pass phrase for integrationserver.key:
    You are about to be asked to enter information that will be incorporated
    into your certificate request.
    What you are about to enter is what is called a Distinguished Name or a DN.
    There are quite a few fields but you can leave some blank
    For some fields there will be a default value,
    If you enter '.', the field will be left blank.
    -----
    Country Name (2 letter code) [AU]:DE
    State or Province Name (full name) [Some-State]:Lower-Saxony
    Locality Name (eg, city) []:Vechta
    Organization Name (eg, company) [Internet Widgits Pty Ltd]:Macke IT
    Organizational Unit Name (eg, section) []:
    Common Name (eg, YOUR name) []:localhost
    Email Address []:
    
    Please enter the following 'extra' attributes
    to be sent with your certificate request
    A challenge password []:IntegrationServer
    An optional company name []:
  • Sign the CSR yourself and create a certificate.
    openssl x509 -req -days 365 -in integrationserver.csr -signkey integrationserver.key -out integrationserver.crt
    
    Signature ok
    subject=/C=DE/ST=Lower-Saxony/L=Vechta/O=Macke IT/CN=localhost
    Getting Private key
    Enter pass phrase for integrationserver.key:
  • Convert the certificate to DER (which Integration Server needs).
    openssl x509 -in integrationserver.crt -inform PEM -out integrationserver_der.crt -outform DER
  • Create a keystore containing the private key and the certificate in format PKCS12 (which Integration Server needs).
    openssl pkcs12 -export -des3 -in integrationserver.crt -inkey integrationserver.key -out integrationserver.pkcs12
    
    Enter pass phrase for integrationserver.key:
    Enter Export Password:
    Verifying - Enter Export Password:
  • Take a look at all the generated files and copy them over to a directory where IS can access them.
    ls -la
    
    -rw-r--r--  1 root root  818 10. Jan 18:32 integrationserver.crt
    -rw-r--r--  1 root root  680 10. Jan 18:32 integrationserver.csr
    -rw-r--r--  1 root root  563 10. Jan 18:34 integrationserver_der.crt
    -rw-r--r--  1 root root  963 10. Jan 18:29 integrationserver.key
    -rw-r--r--  1 root root 1581 10. Jan 18:34 integrationserver.pkcs12

Install the certificate in Integration Server

  • Install the keystore via Security -> Keystore -> Create Keystore Alias on IS’s web frontend.
    Add a Keystore Alias in webMethods Integration Server
    Add a Keystore Alias in webMethods Integration Server
    The new Keystore should now be listed.
    List the Keystore Aliases in webMethods Integration Server
  • Install the certificate via Security -> Certificates -> Edit Certificates Settings.
    Add a certificate in webMethods Integration Server

Add an HTTPS Port in Integration Server

  • Security -> Ports -> Add Port
    Add an HTTPS Port in webMethods Integration Server
    Add an HTTPS Port in webMethods Integration Server
  • You may need to configure the Access Mode of the new port, so that folders and services will be available via HTTPS. Simply click on the link in column Access Mode and configure the settings (Security -> Ports -> Edit Access Mode).
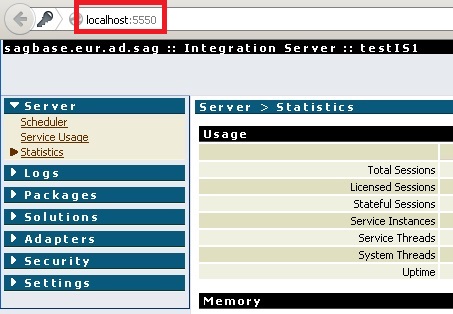
  • Test the HTTPS connection by navigating to https://localhost:5443. The certificate error is ok, because we self-signed our certificate. Add the certificate to the list of trusted certificates and move on. If you use a “real” certificate later, the error will go away.
    Certificate error in webMethods Integration Server


Reference: http://serviceorientedarchitect.com/tag/webmethods-integration-server/

How to import SSL certificates into webMethods Integration Server

In this article I described how you can generate a self-signed SSL certificate to enable HTTPS in webMethods Integration Server: How to create a self-signed SSL certificate for webMethods Integration Server with OpenSSL. Now it’s time to import a realcertificate.
If you have received the signed certificate from your Certificate Authority, you can follow these steps to import it into Integration Server. I’m using OpenSSL on a Linux machine and Java’s keytool on my Windows workstation for the command line work.

Prepare the certificate

  • The private key has to be in PEM format and needs to be BASE64 encoded. At least in my case OpenSSL wasn’t able to handle it otherwise.
  • First of all, you need to protect your private key with a password, if you haven’t already done so.
    openssl rsa -des3 -in integrationserver.key -out integrationserver.key
  • If the certificate is in format DER (in my case it was and the file had the ending cer), it has to be converted to PEM:
    openssl x509 -in integrationserver.cer -inform DER -out integrationserver.crt -outform PEM
  • Now the keystore for Integration Server can be created:
    openssl pkcs12 -export -des3 -in integrationserver.crt -inkey integrationserver.key -out integrationserver.p12
  • Now we need to create a Truststore containing the issuing certificates of our certificate. You need to download the required certificates for the whole certificate chain and add them to a Truststore:
    keytool -import -alias rootCA -keystore integrationserver.jks -file rootCA.crt
    You need to repeat this command for each certificate of the chain with a unique alias.

Import the certificate into Integration Server

  • Create a Truststore Alias under Security -> Keystore -> Create Truststore Alias.
    Create a Truststore Alias in webMethods Integration Server
  • Create a Keystore Alias under Security -> Keystore -> Create Keystore Alias.
    Create a Keystore Alias in webMethods Integration Server
  • Create an HTTPS Port Security -> Ports -> Add Port.
    Create an HTTPS Port in webMethods Integration Server
  • Enable access through the new port.
    Enable access through an HTTPS Port in webMethods Integration Server
  • Test your new HTTPS connection in a browser:
    https://YOUR-SERVERNAME:5443/

How to create a new webMethods Integration Server instance


In newer versions of the webMethods suite, you can install multiple instances of Integration Server into a single installation. Some central packages will be re-used in every instance. However, administration of the instances may be a bit harder, as these packages have to be updated manually, e.g. in case of a version update or fix installation.
Here is how to setup a new Integration Server instance (ISDIR points to the Integration Server directory, e.g. C:\SoftwareAG\IntegrationServer):
  1. Run ISDIR\instances\is_instance.bat create -Dinstance.name=testIS1 -Dprimary.port=5550 -Ddiagnostic.port=9990 -Djmx.port=8077 -Dlicense.file=C:\license.xml
    This will start an Ant build that creates the new IS instance under instances\testIS1. Of course, you may need to adjust the parameters according to your needs.
  2. If the build finishes successfully, the instance can be started with ISDIR\instances\testIS1\bin\startup.bat. You should now be able to connect to localhost:5550 and see the administration page for your new instance:
    Administration page for the newly created Integration Server instance
  3. If you want to install the new instance as a Windows service, you can run ISDIR\instances\testIS1\support\win32\installSvc.bat:
    Create a new service for the newly created Integration Server instance
    You should now see another IS service:
    The service for the the newly created Integration Server instance
  4. You should also see the new instance in Command Central. A refresh or a restart of the platform manager may be needed.
    The newly created Integration Server instance in Command Central

Universal Messaging integration with JNDI

Universal Messaging is the default messaging component used by webMethods Integration Server. Here is a short tutorial how you can test JMS processing using SoapUI and HermesJMS.
  • SOAPUIDIR points to the installation directory of SoapUI, e.g. C:\Program Files\SmartBear\SoapUI-5.1.3.
  • NIRVANADIR points to the installation directory of Nirvana, e.g. C:\SoftwareAG\nirvana.

Setup Universal Messaging

  • First of all you need to create the needed artifacts in your Universal Messaging realm. Start with the JNDI Provider URL and click Apply.
  • Then add a Connection FactoryTopic Connection Factory, and TopicCreate artifacts in Universal Messaging

Setup Integration Server

  • Create a JNDI Provider Alias for Universal Messaging under Settings > Messaging > JNDI SettingsCreate JNDI Alias in Integration Server
  • You can now test the alias and should see the artifacts you created in Universal Messaging: Test JNDI Alias in Integration Server
  • Create a JMS Connection Alias for the JNDI Alias under Settings > Messaging > JMS Settings. Use the corresponding values from Universal Messaging for JNDI Provider Alias Name and Connection Factory Lookup NameCreate JMS Connection Alias in Integration Server
  • Enable the Connection Alias: Test JMS Connection Alias in Integration Server

Setup SoapUI/HermesJMS

  • Copy the following JARs to SOAPUIDIR\hermesJMS\libNIRVANADIR\lib\jndi.jarNIRVANADIR\lib\nClient.jarNIRVANADIR\lib\nJ2EE.jarNIRVANADIR\lib\nJMS.jar.
  • Create a new session named IS and add all above JARs to a new classpath group named IS: Add provider JARs for Universal Messaging to HermesJMS
    Click Apply and restart HermesJMS.
  • You should now be able to select IS under Loader and hermes.JNDIConnectionFactory under ClassConfigure session in HermesJMS
    Add the properties hostportinitialContextFactoryproviderURL, and bindingunder Connection Factory and configure them according to your environment. You can find the needed values in the JNDI settings of Universal Messaging: JNDI properties in HermesJMS
  • You should now be able to discover queues and topics for the session: Discover queues and topics with HermesJMS
  • To test the subscription to a topic, you can now browse the topic: Browse topic with HermesJMS
  • If you send a test message with Software AG Designer, you should see the message in HermesJMS: Send a JMS test message with Integration Server
    Browse the JMS messages in HermesJMS

Possible errors

  • hermes.HermesException: The binding property to locate the ConnectionFactory in the Context is not sethermes.HermesException: The binding property to locate the ConnectionFactory in the Context is not set
    Add the property binding under Connection Factory in the session preferences (right-click on the session and Edit).

Additional Links

http://um.terracotta.org/index.html#page/Universal_Messaging_Documentation_Set/to-overview-jndiadmin.html

http://techcommunity.softwareag.com/web/guest/pwiki/-/wiki/Main/Using+webMethods+Integration+Server+with+webMethods+Nirvana+Messaging

https://community.smartbear.com/t5/SoapUI-NG/subscribe-to-JMS-queue-on-Universal-Messaging-webmethods/td-p/95227

http://serviceorientedarchitect.com/how-to-test-jms-processing-in-webmethodsterracotta-universal-messaging-and-integration-server-with-soapui-and-hermesjms/